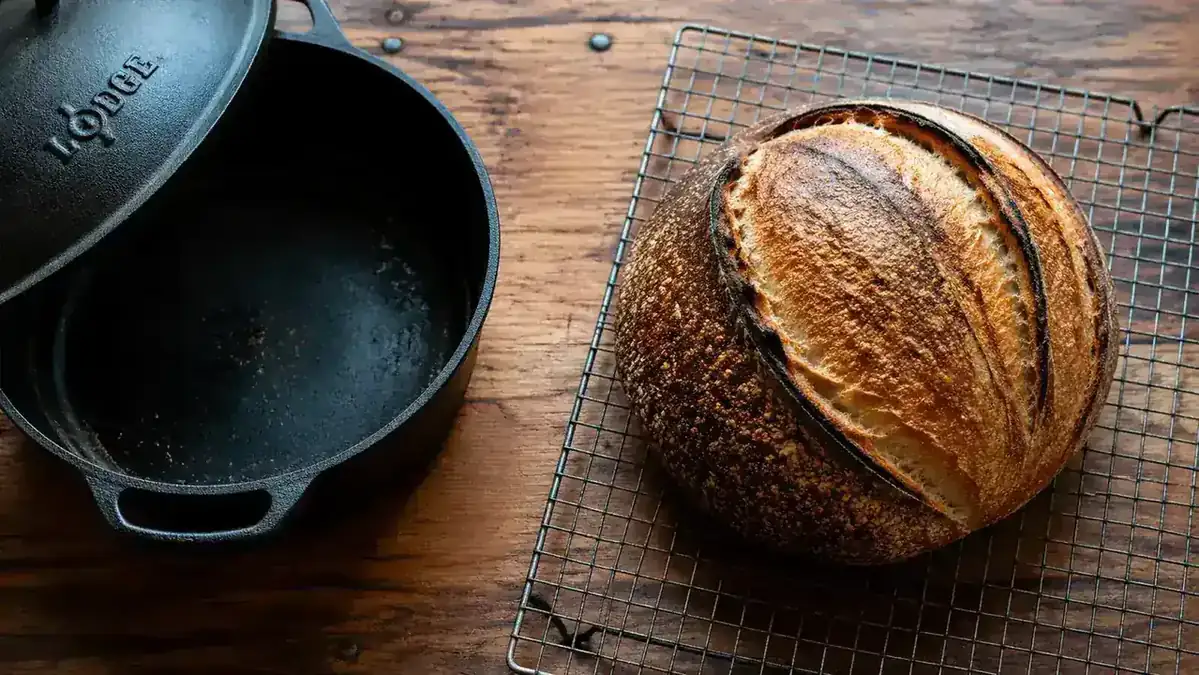
For two years I chased the perfect sourdough crust and came up empty. I tried the ice-cube-in-the-oven trick. I tried covering the loaf with foil. I tried a roasting pan flipped upside down as a steam trap. The loaves came out pale, a little dense, and without that crackly ear I kept seeing in every baking photo online. My starter was fine. My shaping was decent. The problem was that my oven, like most home ovens, bleeds steam the moment the door seals shut. A Dutch oven solves that problem at the source. It traps the steam the dough releases during the first critical minutes of baking, letting the crust stay soft and extensible long enough for the loaf to spring fully. When I switched to the Lodge Cast Iron Double Dutch Oven 5qt, the first bake looked like something from an actual bakery. That was not an accident of skill. It was an accident of equipment.
This guide walks through every step I use now: preheat temperature, timing, how to load the dough without burning yourself, exactly when to pull the lid, and the cooling step that most bakers skip but that matters more than they think. The Lodge Double Dutch Oven is what I use and recommend, and I will explain why as we go through each step.
Your oven is leaking steam. That is why your sourdough crust is pale.
The Lodge Cast Iron Double Dutch Oven 5qt traps steam from the dough itself, no ice cubes or foil needed. It comes pre-seasoned, the lid doubles as a skillet, and it costs a fraction of the enameled alternatives. Check today's price on Amazon before you start your next bake.
Amazon Check Today's Price on Amazon →What You Need Before You Start
This guide assumes your sourdough dough is already mixed, bulk fermented, shaped, and cold-proofed in the refrigerator. The Dutch oven method begins when you are ready to bake, not at the mixing stage. You will need your Lodge Double Dutch Oven, a sheet of parchment paper cut to roughly 12 by 12 inches, a sharp bread lame or a razor blade for scoring, heavy oven mitts that cover your wrists (cast iron transfers heat fast and completely), and a wire cooling rack. That is the full list. No spray bottles, no baking stones, no added water in a pan.
One thing worth knowing about the Lodge Double Dutch Oven before you start: the lid is flat on the inside, which means it functions as a skillet when flipped. That is not a gimmick. The flat underside is why the dough has enough headroom inside the pot during the oven spring phase. Domed lids are actually trickier for tall loaves. The Lodge design handles both jobs well, and at its price point, it is the most practical buy in cast iron bakeware for sourdough.
Step 1: Preheat the Dutch Oven Inside Your Oven
Set your oven to 500 degrees Fahrenheit and place the Lodge Double Dutch Oven, both pot and lid together, on the center rack while the oven heats. Do not skip this step, and do not shorten it. The Dutch oven needs at least 45 minutes to preheat properly after the oven signals it has reached temperature. Most ovens reach their set temperature 10 to 15 minutes before the internal thermal mass does. If you load your dough into a partially preheated cast iron vessel, the bottom of your loaf will be underbaked and the spring will be weak.
I set a separate timer for 45 minutes after my oven beeps, and I use that time to pull the shaped dough from the fridge and score it. Cold dough scores more cleanly than room-temperature dough because the surface is firmer. Pull it out right before you are ready to load.
A note on oven position: center rack is correct for the Lodge 5qt. The pot sits lower than you might expect because the lid adds height. If you place it too high, the top of the loaf may get too close to the broiler element. Center rack, and your loaf will have even airflow on all sides.
Step 2: Score the Dough
While the Dutch oven finishes its preheat, lay your parchment paper flat and turn the cold dough out onto it, seam side down. Work quickly. A lame held at a 30 to 45 degree angle to the dough surface creates the ear. A blade held at 90 degrees straight down creates a more open expansion without a distinct ear. Neither is wrong. The angle determines the outcome you want.
One score cut, confident and deliberate, is better than two or three hesitant ones. I do a single curve along the top of the loaf, starting about an inch from one end and finishing about an inch from the other. The cut should be half an inch deep. Too shallow and the loaf will blow out on the side instead of following your score line. Too deep and you deflate the loaf before it even gets in the oven.
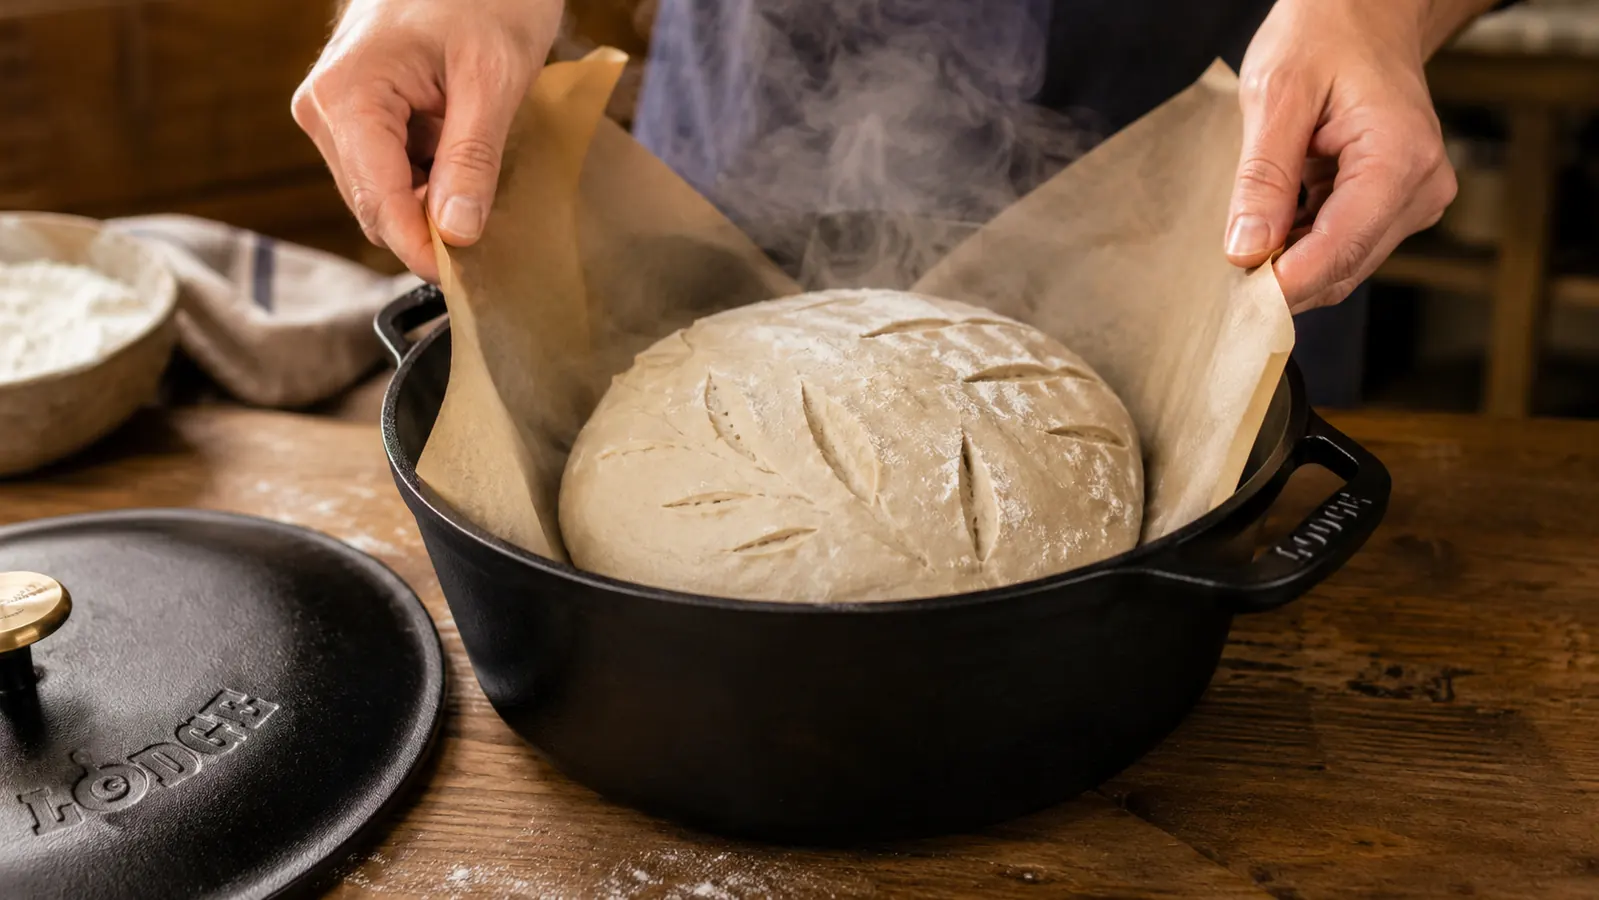
After scoring, gather the parchment paper up around the sides of the dough to form a sling. This is how you will lower the dough into the preheated Dutch oven without burning your hands or dropping the loaf.
Step 3: Load the Dough Into the Hot Dutch Oven
Put on your oven mitts before you open the oven door. Pull the rack out partway with the mitts on, then remove the lid of the Lodge Dutch Oven and set it on a heat-safe surface. The pot will be somewhere between 475 and 500 degrees at the handle and the rim. This is not the moment for quick, unprotected reaches.
Lower the dough into the pot using the parchment sling. The dough will sit on the parchment inside the pot. Let the parchment crinkle up around the sides. It will not burn at 500 degrees for the short time it is in the oven. Drop the lid back on, slide the rack in, and close the oven door. The entire loading process should take no more than 30 seconds. Every second the lid is off is steam escaping from the pot and heat dropping in the oven.
The Lodge pot is already seasoned, already the right size for a one-pound boule, and it heats completely evenly in 45 minutes. That last part matters more than any other spec on the box.

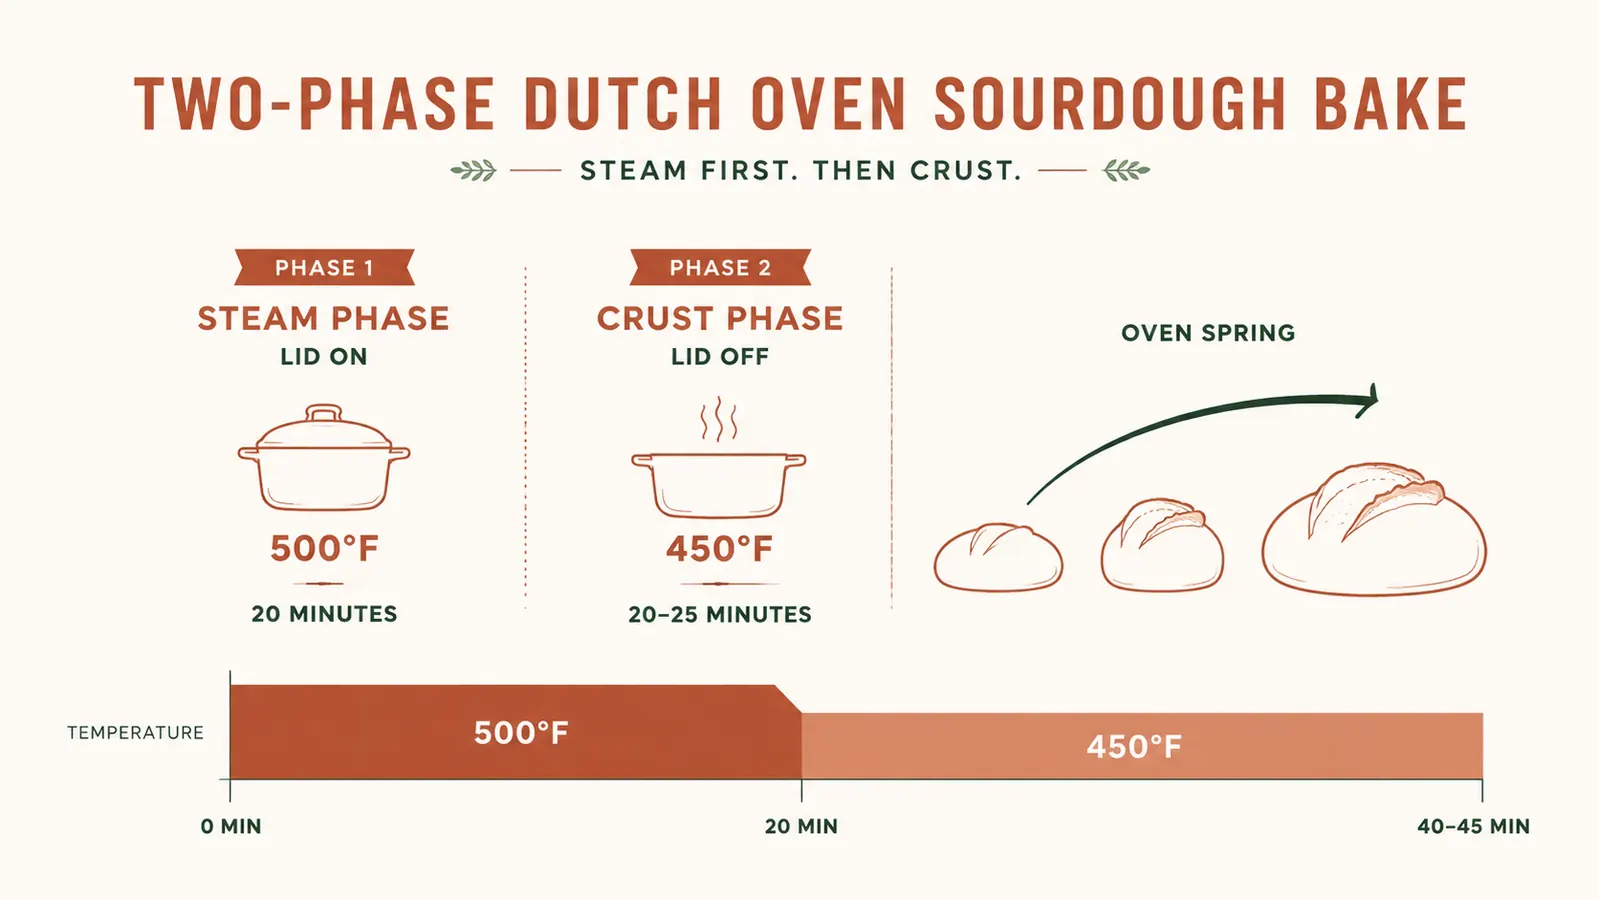
Step 4: Bake Lid-On at 500 Degrees for 20 Minutes
The first 20 minutes are the steam phase. The lid traps all the moisture the dough releases as it heats, creating a humid environment that keeps the crust elastic. This is what allows oven spring. If the crust sets too quickly, the dough cannot expand, and you end up with a dense loaf with no ear regardless of how well it proofed. The Lodge cast iron holds heat so consistently that you can trust these timings. Thin, lightweight bakeware holds its heat less reliably and often requires adjusting.
Do not open the oven during this phase. Not to check on it. Not to take a peek. Opening the door drops the oven temperature and releases the steam the dough is generating inside the pot. Set the timer and walk away.

Step 5: Remove the Lid and Drop the Temperature to 450 Degrees
After 20 minutes, open the oven, pull the rack out partway with your mitts on, and remove the lid of the Dutch oven. The loaf should already show clear oven spring and the score should be open. Set the lid aside on a heat-safe surface. Drop the oven temperature to 450 degrees and close the door. The loaf will now bake uncovered for another 20 to 25 minutes.
This is the crust phase. The outside of the loaf will deepen in color rapidly without the steam protection of the lid. Watch for a dark mahogany color, not golden brown. Pale sourdough is undercooked sourdough, and the internal temperature tells you more than the color does alone. A finished sourdough loaf reads 205 to 210 degrees Fahrenheit on an instant-read thermometer inserted through the bottom. If you do not own a thermometer, aim for a crust that is deeply brown and sounds hollow when tapped on the bottom.
Every oven runs a little differently. My oven is accurate enough that 22 minutes at 450 degrees gives me the color I want. Your first bake is your calibration bake. Take notes.
What Else Helps
A few things alongside the Lodge Dutch Oven method will consistently improve results. Cold proofing overnight in the refrigerator (8 to 16 hours) makes dough easier to score, gives better flavor development, and extends the window between proofed and overproofed. If you have been bulk fermenting at room temperature and baking the same day, try the overnight cold proof. The difference in ear development is significant.
Parchment paper quality matters more than most people realize. Cheap, thin parchment can scorch at 500 degrees and transfer a paper smell to the bottom of the loaf. I use unbleached parchment rated to at least 450 degrees. It is a small detail that removes one variable.
If you are using the Lodge Double Dutch Oven with a stand mixer to develop your dough, the combination is worth noting separately. Cast iron bakeware and a reliable stand mixer are the two pieces of equipment that have the most effect on sourdough outcome for home bakers. I have a separate guide on baking bread with a stand mixer if you want more on the mixing and kneading side of the process.
Step 6: Cool Completely Before Cutting
Pull the loaf from the Dutch oven using your mitts and the parchment sling and set it on a wire rack. Do not cut into it for at least one hour, and two hours is better. The interior of a sourdough loaf continues to cook and set after it comes out of the oven. Cutting too early releases the steam that is still finishing the crumb structure, and you get a gummy, undercooked interior even if the crust looks perfect.
I know it is hard to wait. But it is the step that makes the difference between a loaf that photographs well and a loaf that actually eats well. One hour minimum. Two if you can manage it.
Why the Lodge Double Dutch Oven Is the One I Recommend
There are three reasons I tell every home baker who asks me about Dutch ovens to start with the Lodge 5qt Double Dutch Oven before spending three or four times as much on an enameled alternative. First, the pre-seasoned bare cast iron develops more naturally over time than enamel does. You bake in it, you maintain it, and it gets better. Enamel can chip, and once it chips, the pot is compromised. Bare cast iron is essentially indestructible with minimal care.
Second, the Lodge 5qt is sized right for the loaves most home bakers make. A one-pound boule fits with room to spring. The diameter at the base is wide enough that the dough is not squeezed against the sides before it has finished expanding. Some smaller Dutch ovens, including certain enameled 4qt versions, are too narrow and produce taller, more compressed loaves.
Third, the lid. The flat-bottomed lid of the Lodge Double Dutch Oven sits level as a skillet on a stovetop, which is a real second use and not just marketing copy. But for baking, what matters is that the flat interior gives the rising loaf space. A dome lid can press against a high-rising loaf during spring. The Lodge lid has not been an issue in hundreds of bakes at this point.
At its current price, the Lodge Double Dutch Oven is priced more like a piece of functional cast iron cookware than a specialty baking item. That pricing is accurate. It does both jobs. You can read a full breakdown of how it compares to Le Creuset and other enameled Dutch ovens in the Lodge Dutch Oven review linked below, but the short version is that for baking sourdough, the Lodge performs at the same level and costs significantly less.
Ready to get that ear and dark crust? The Lodge is where to start.
The Lodge Cast Iron Double Dutch Oven 5qt has 4.7 stars across more than 15,000 reviews and it is what Tina uses for every loaf. Pre-seasoned, rated for high oven temps, and the lid is a legitimate skillet. Check today's price and see if it is in stock.
Amazon Check Today's Price on Amazon →Related Reading
If you want a deeper look at the Lodge Double Dutch Oven before buying, the long-term review covers what holds up after years of heavy use and how to maintain the seasoning: Lodge Cast Iron Double Dutch Oven Review.
If you use a stand mixer to develop your sourdough dough, there is a full guide to mixing and kneading bread dough that covers hydration ratios, dough hook timing, and what to look for when the dough is properly developed: How to Bake Bakery-Quality Bread at Home Using a Stand Mixer.